
How To Take Better Product Photos on a Budget With Your Phone

Taking Better Product Photos with Your Phone is Totally Possible!
We’re all working within our respective budgets, and even though I truly believe that professional photography is a great investment for any business, sometimes the funds just aren’t available - and I totally get that! Hence why I’ve put together this handy manual for taking products on your own with a few inexpensive materials and your cell phone.
*Note: All of the photos in this tutorial were taken with my iPhone. However, when I typically take product photos I use my DSLR camera.
Step 1: The Set Up
Here’s an easy set up for getting a clean white background for your product photos. This is a great set up for products that are smaller or equal to the size of a shoebox.
You will need:
A table
A chair
A piece of white foam core
A sheet of white bristol board
Transparent tape
(I got all my materials from Maggiolly Art Supplies in Orangeville!)
Set up the table and chair in a bright room in front of a window, OR you can set up outside if the weather is permitting (overcast days are best for even light!). Position the chair so it is sitting opposite the table from the light source / window.
Lean the foam core on the table by sitting it on the chair. Lay the bristol board flat on the table, and then slide it up the foam core so it’s half on the table and half on the foam core with a rounded curve between them. Tape the top bristol board to the foam core to hold it in place.


Step 2: The Product
Position your product in the centre of the bristol board, a good distance from the foam core. You want to create some depth between your product and the background.
Make sure you’re showing off your product’s good side! For a lot of products, a 45 degree angle looks really nice, rather than shooting it straight on. You want to show that your product is 3D and has depth!
Step 3: The Camera - Your Phone
Open up your camera app. Click the 2x button, or if you don’t have that button, zoom in a little bit. This will remove the wide-angle effect of the lens, which you typically don’t want for product shots. Wide-angle lenses can make your product look distorted and unflattering. This is why I take all my product photos and portraits with a 50mm lens. It also helps to minimize the amount of background content you’re seeing.
These two screenshots were taken from the same distance. The first one is at 1x and the second is at 2x (zoomed in a little).

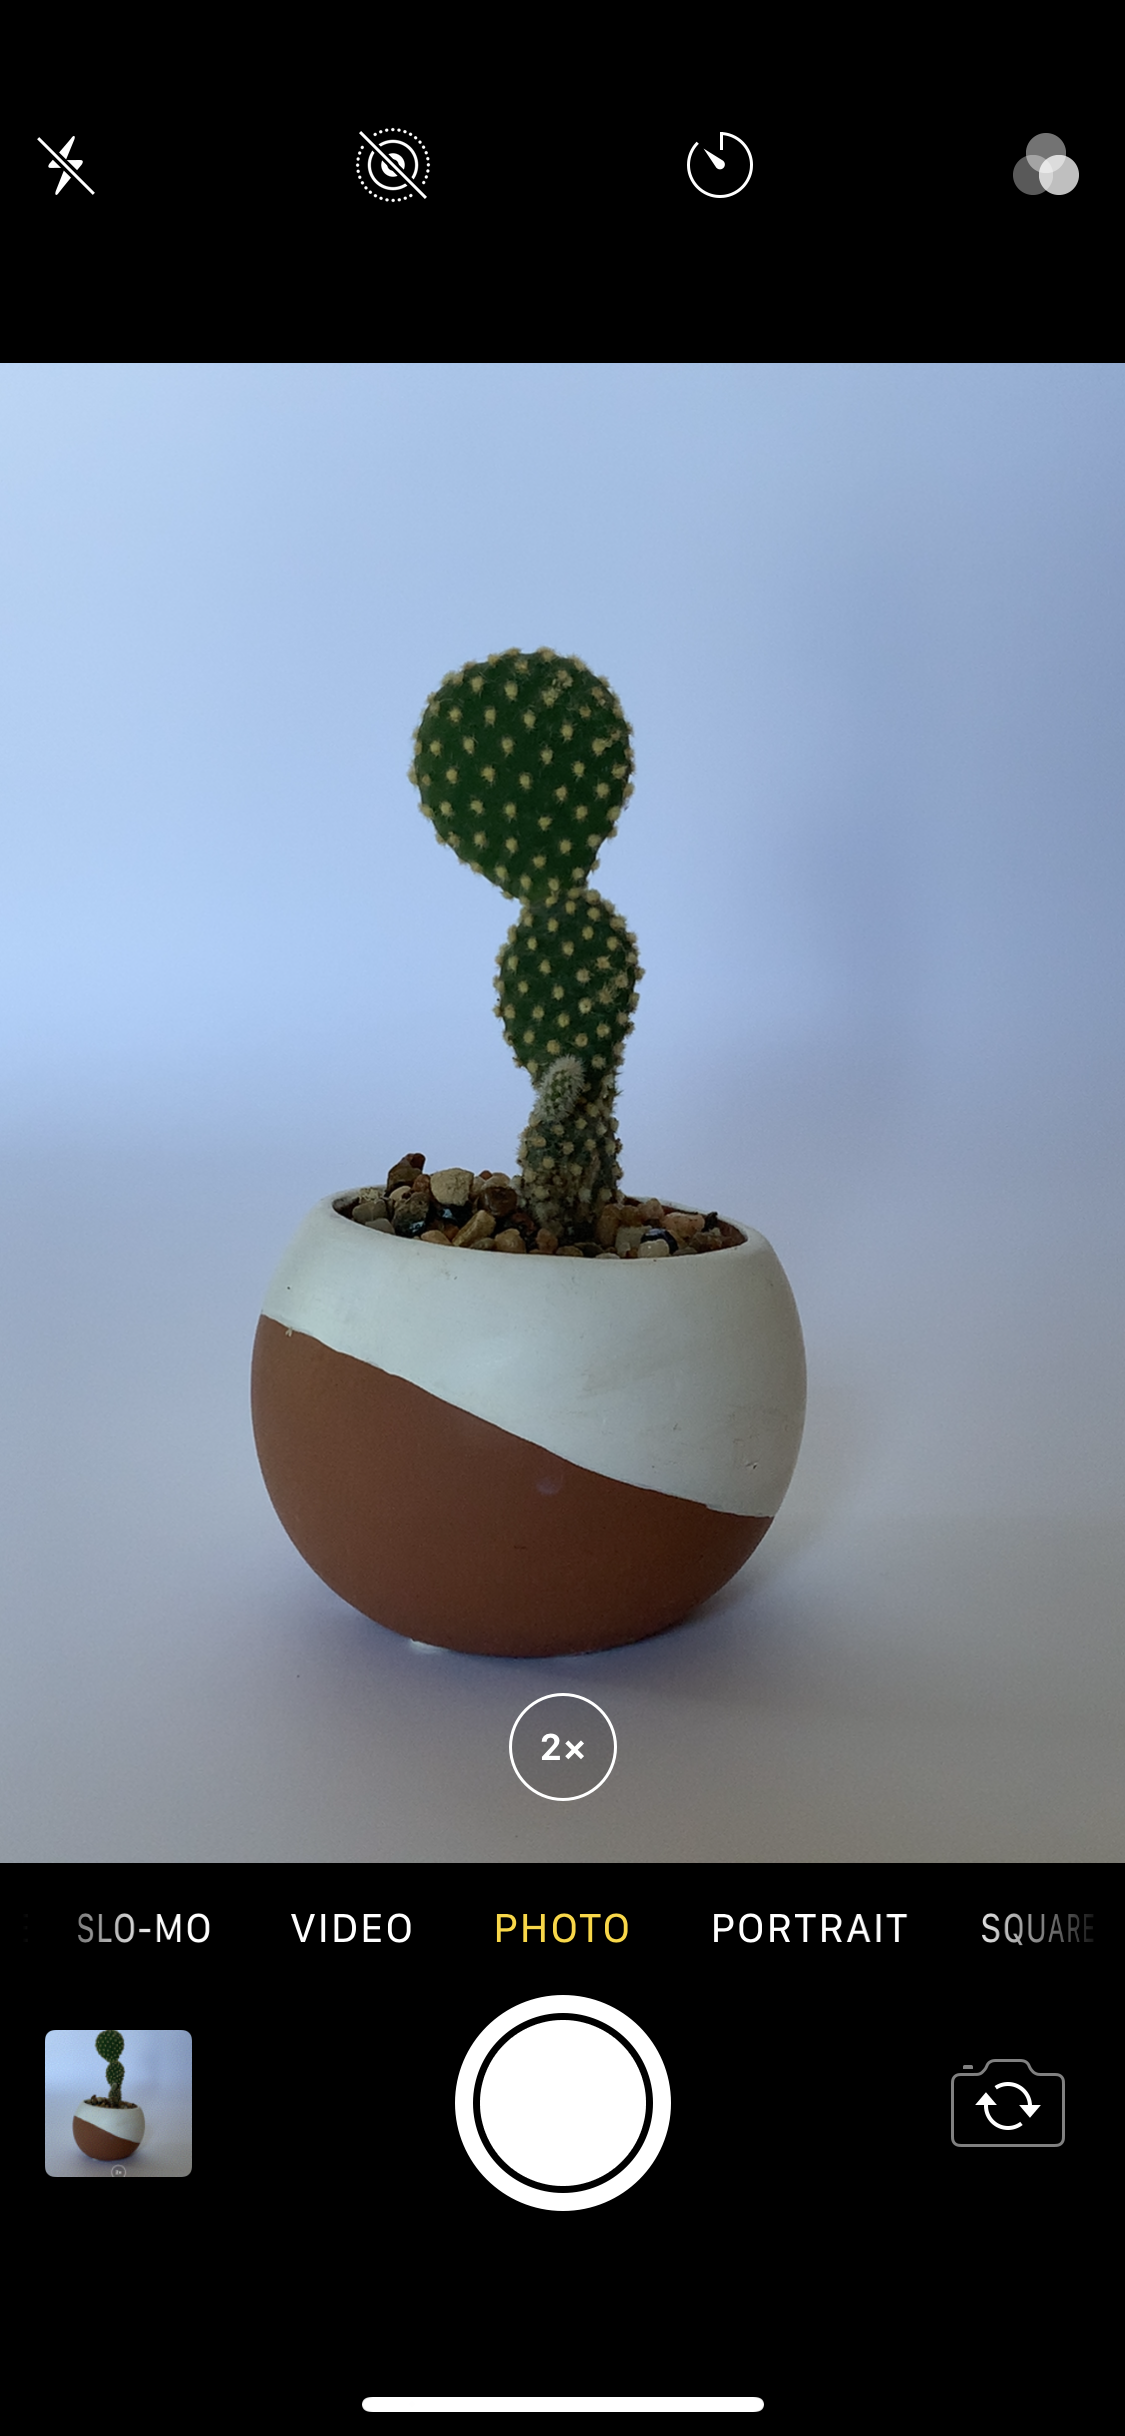
Time to get down! For a lot of products, like this cute little cactus, you’re going to want to get on the same level as the product. So take the photo from straight on, not above the product. Some products might require a higher angle, like a basket of strawberries, or jewellery that’s laying flat.
Try to make sure your camera is as level as possible, not crooked, but you can always fix that in the editing.
Ok, here’s the product shot:

Step 4: Editing
You can get pretty good results just using the built-in photo editor on your phone, but if you have a program like Photoshop or Lightroom, then I suggest you use that.
I increased the brightness and contrast, and increased the brightness of the highlights to try to blow out the whites. I also desaturated and lightened the blue tones. This is the result:

There you have it! I hope this helps you with your iPhone product photography! Let me know if you have any questions, and share your iPhone Product Photos with me on instagram @truenature_media !